|
| Spitfires at the Biggin Hill Heritage Hangar |
Modern digital SLRs lend themselves to photography not just during the day time: given the astonishing ability of current sensors to convert just a few photons into a good image, the prospect of photographing anything – even flying aircraft – at night has become a reality. Not only that but the ability to chimp on the back screen to check exposures means that shooting at night has become easier and much less hit and miss. This blog piece is about photographing aircraft in twilight, or after dark, and relates primarily to photographing them static, and with good access to an airfield.
Organisers of aviation-related events are beginning to understand the demand from photographers for pictures that are different from standard air show fare. Once in a while there are opportunities to shoot on an airfield at twilight and after dark, albeit in dim conditions with only the light from hangers to illuminate the aircraft.
As an alternative, if access to an airfield can be arranged, light painting now offers a realistic option of getting views of aircraft that are both dramatic and different from the run of the mill.
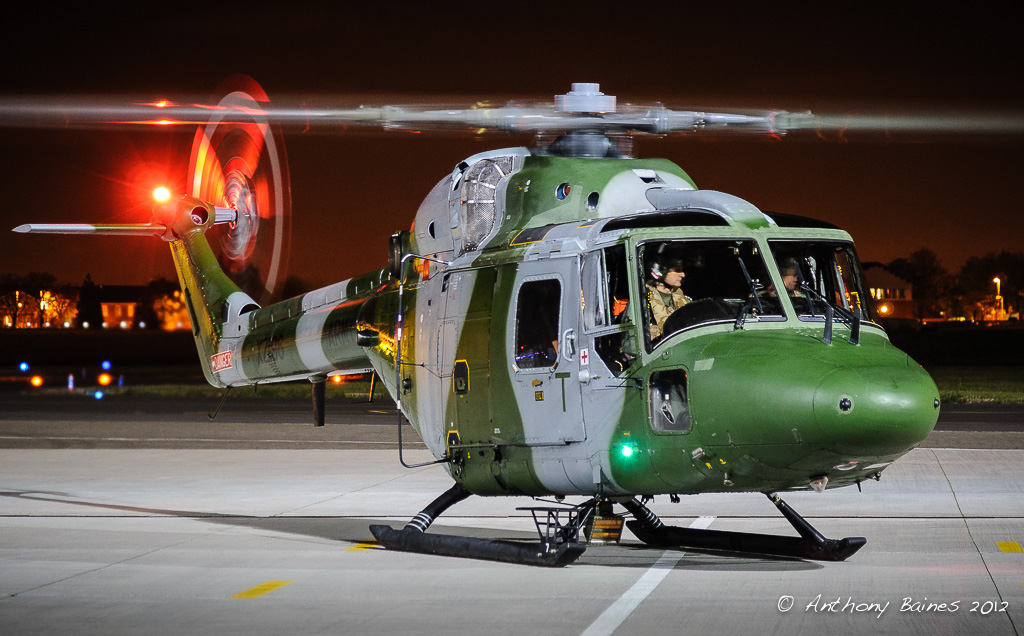
At organised nightshoots, the aircraft are usually static with engines switched off. However, sometimes the pilots of propeller aircraft can be persuaded to run their engines, the corresponding slow exposures yield prop circles. Occasionally, it is possible to photograph a helicopter hovering by hangar light.
Over the last two or three years I've done quite a bit of night shooting at airfields. There's a few hints and tips that I've worked out over that time that I thought I should share here. But I'll give the quick summary anyway if you haven't got time to read everything below.
Actually, it's really not very hard. 90% of it can be summed up as follows: shoot Raw, at best quality ISO, use a tripod with good technique, check the exposure both on the histogram and the blinkies. Don't use flash, unless you are light painting a static aircraft: flashes are dangerous on airfields as they can damage night adaptation of flight crew's vision. That is really is most of it.
Having said that, I'll expand a bit more detail.
 |
| Including people often adds interest. Note also that the exposure range here is quite large: careful metering is required to keep details in the dark and light areas of the picture. Shooting RAW is a big help in this. |
Use RAW
Night shooting is one of those occasions when the real benefits of RAW make themselves felt. With RAW images, it's possible to change the white balance in post-processing with minimal compromise to the quality of the image: this is something that is essential in night shoots where you're likely to be dealing with mixed light sources. Equally, the dynamic range of the subject tends to be huge, from brightly lit up top surfaces to deep shadows under wings: recording images at full 14 stop range gives the best chance of revealing the details of both.
Use a tripod
Clearly, shooting at night means that generally you have to expect very little light even with hangar lights illuminating the subject. To get the highest quality image, it is best to use base ISO (ISO 200 on my Nikon cameras, ISO 100 on many Canon cameras): shadow areas under wings, for instance, can be very dark indeed, and it is in the shadows that noise lurks; using base ISO is the way to minimise shadow noise. In general, exposures tend to be in the range 2-20 seconds, so a good tripod is essential. (I take the
Thom Hogan view of buying a tripod: I am amazed at the number of people who bring spindly cheap things along to night shoots and then put expensive DSLRs and heavy lenses on them). If you get a lot of people in a small area at a night shoot, tripods tend as much trip hazard as camera support, but they are essential anyway. And don’t forget to use a remote/cable release for the shutter, and mirror lock up or delay to minimize camera vibrations.
 |
| Errr ... not actually a nightshot, but in the evening beforehand. High viz vests and trip hazards abound on this airfield. |
... Or don't use a tripod
Having said that, it is now becoming possible to use a camera without a
tripod. Some of the Sony DSLRs have a multiple exposure noise reduction
mode, where multiple pictures are taken at very high ISO and then
averaged to minimise the noise and increase definition. One photographer
at a recent shoot standing next to me did everything by hand with his
Sony: the camera gave rapid whizz-whizz-whizz sound as it took multiple
images. It seemed to work extremely well, judging by
pictures he posted afterwards.
 |
| Handheld at f/1.4 |
And there is one other choice too: a fast lens and high ISO. If you are lucky enough to get something like a helicopter hovering by hangar light, the only way to photograph it in flight is to use a reasonably fast shutter speed. At a recent night shoot, I took along my 50 mm f/1.4 lens: I set the D700 to ISO 3200, the aperture wide open, the camera to aperture priority exposure and crossed my fingers. This gave me exposures around 1/40th second which was just about OK for getting hovering helicopters.
Having said that, I still wouldn't recommend anything other than using a tripod to both support the camera and help you with control and composition.
Metering and exposure
 |
| It is very easy to lose shadow detail: this Lynx was given +0.67 stops exposure compensation to prevent this |
Metering at night can be quite difficult. Ideally, it's good to "expose to the right", i.e. get as much light into the exposure as possible without blowing the highlights. But aircraft often have specular reflections from artificial lights, so these can confuse the evaluation of exposure.
Usually an aircraft is illuminated by something like hangar lights which give a bright foreground, but then the light fades off quickly so that the sky, and any background is dark. Aircraft themselves may be painted anything between white and black, so it's very difficult to establish a general rule for how to choose and exposure.
My general approach is to begin with standard matrix metering and aperture priority exposure mode. I'll start with a preliminary exposure without any compensation, and then look at the histogram and any blinking highlights in the display on the back of the camera. From there, I'll dial in exposure compensation to increase the exposure until the highlight warning starts to blink. There's often very bright reflections on small parts of the aircraft where any illumination reflects directly at the camera. Usually, it's impossible to do anything about these, so normally I'll accept small areas of blinking highlights on the camera's display, in order to get sufficient exposure that detail is nicely revealed in shadow areas.
Typically, I'll end up with +1-+2 stop exposure compensation.
I normally work in aperture priority mode to ensure that I get the depth of field I want across the subject. Once the exposure was worked out in aperture priority, it can sometimes be useful to go into manual mode and lock in that exposure: artificial lights shouldn't change, so the exposure doesn't need to change.
 |
| The Martin-Baker Meteor. How would you meter for this? |
For really difficult subjects, like a black-painted aircraft (like the Martin-Baker Meteor), you could spot meter and set the upper fuselage in, say,
Zone II: let me know how it goes if you ever try it!
White balance
In general terms, it should be possible to set a fixed white balance to go with the colour temperature of the lights illuminating the subjects. On my first night shoot, I thought I would bring along a grey card and use that to establish a white balance, which could then subsequently be applied to all the pictures. In practice, it has never worked out like that. The lighting always tends to be rather mixed. At some places, the hangar light is pretty close to daylight balanced; but in the background that maybe sodium lamps. This can give rather horrid effects that vary from place to place on an airfield.
It is much simpler to set an auto white balance the camera. Auto white balance these days does amazingly well, and I find it simpler to tweak the white balance in post processing than worry about trying to set an exact white balance at the time.
Choosing shutter speed and aperture
 |
| f/11 gave enough depth of field for this Tornado, and it didn't wander off during the 15 sec exposure :-) |
Aircraft have depth to them, and if you're reasonably close to them only
to consider and aperture the get some sharp all the way across if
that's what you want. Often, it's convenient to work at about f/11,
because typically that gives sufficient depth of field, without much in
the way of diffraction effects reducing resolution. However, that
aperture is a real restriction on the amount of light getting in and
even with good lighting, at ISO 100 or 200 and exposure time will be
several seconds.
Long exposures are normally not a problem at
night shoots. Static aircraft don't get fidgety, so it really doesn't
matter how long the exposure is. Not only that, but when aircraft are
running their engines, the propellers make attractive circles with long
exposures.
The limitation of long exposures is when people are in
the image or an aircraft is actually flying. People are really
difficult, because a pilot checking out an aircraft, for instance, will
never stand still. If you want to freeze the human, there's no option
but to open the aperture and increase the ISO.
 |
| If you're lucky, 1/10th second exposure can be OK. AgustaWestland AW-109E. |
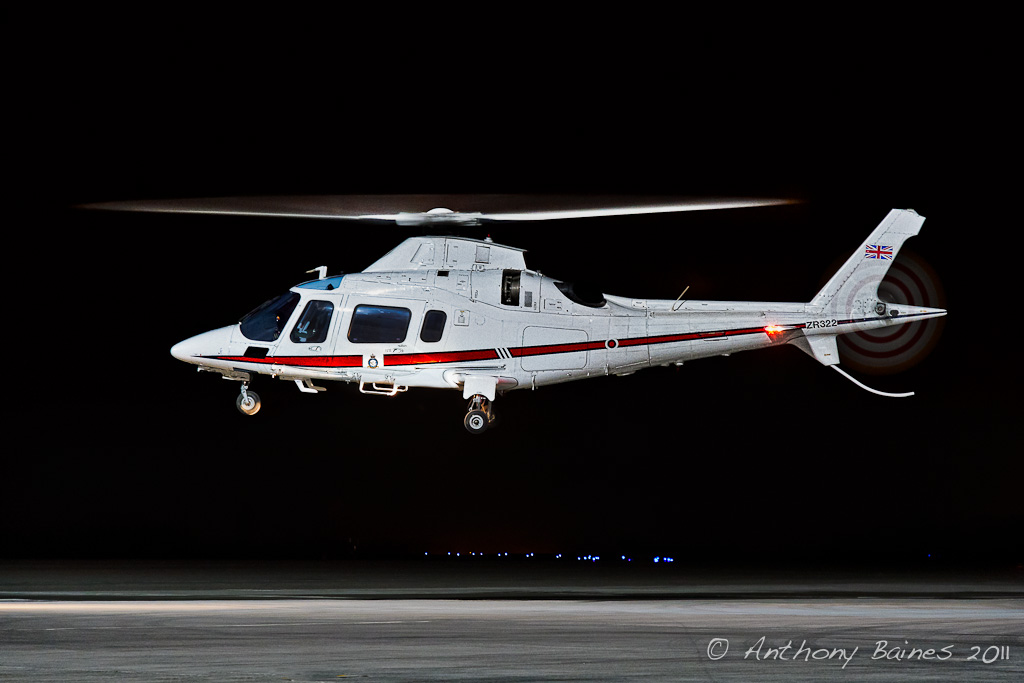
Hovering helicopters also offer a challenge. As long as they are not moving very quickly, exposures around 1/40 are about right and that can be got on most recent cameras simply by turning up the ISO and using the fastest lens you have got.
Framing and composition
This is a matter of personal taste, so I won't comment on this much. However, don't be afraid to include sky in a picture, because that's where aircraft are really meant to be. Even when they're static, it is good to give the impression that they can move forward by leaving space in the picture where they can move into. (It is probably different if you are going to submit your picture to one of the aircraft databases because they like everything cropped very tight; however for most other purposes it's good to give the aircraft room to move).
Night skies, certainly here in the South of England, are rarely completely dark. There's usually a deep orangey-brown glow from reflected street lights in the distance. Not only that, but very often night shoots will actually begin in late evening when there is still light in the sky.
Graduated Neutral density filters for evening shoots
 |
| The Kent Spitfire, TA805, in a pool of hangar light as evening falls. the sky was brought out with a 2 stop ND grad. This picture was a UKAR Picture of the Week. |
Evening shoots in particular benefit from bringing out the details of the sky. Aircraft tend to be much darker than the sky, so it's useful to bring the sky down by using a graduated neutral density filter. I often use a 2-3 stop Lee hard grad for this. Shooting Raw means that you have a chance of doing this in post anyhow, but I find that adding an ND grad makes this much easier, with much less fiddling needed in post, and a better range of tones available anyhow.
Things to look for
 |
| Flames from a Merlin engine |
Engines, especially on vintage aircraft, often emit blue flames from the
exhausts which become visible after dark when they're running. This
gives a real sense of drama to the image. Unfortunately, they don't emit
these very consistently, say have to be prepared to take multiple
exposures, each of which will be several seconds, to ensure getting the
blue flames.
 |
| Checking over his Alpha: a French pilot inspects his cockpit |
Watch out for the activity of aircrews. They will often go out of a plane, check it over, and carry out other activities before getting in. It is often quite possible to capture the activity of crew members in this way, and this gives a bit of extra life to the image.
 |
| Typhoon on tow |
The same applies to the activity of ground crews. Be prepared for aircraft be towed in and out of hangers: this often provides good opportunities for capturing the life of the airfield. (It scarcely needs saying, but be prepared to get out of the way when an aircraft is towed – don’t wait to be asked – or run over).
When it is raining (or if some water has very kindly been poured onto the ground ☺) It's possible to capture very nice reflections. Watch out reflections, and consider including them in your image.
Backgrounds
Backgrounds are always a bit of a problem with night shoots. Very often there are ugly sodium, fluorescent or tungsten lamps that shine brightly across the other side of the airfield. This can be very distracting from the subject. The only thing to do is to watch out for them, both when composing the image initially, and when chimping. You can sometimes move position, or choose a higher or lower angle to conceal the worst behind the subject. It rarely helps to open the aperture wide. Even at f/1.4, given the distance between the subject and the camera, the depth of field is great enough that distant lights still form relatively compact spots rather than disappearing in elegant blur.
 |
Focus-stacked bokehrama of a Typhoon: not a night shot, but in the evening, anyhow :-). 105mm at f/2.
5 portrait format images in a row, blended into a pano, and then further rows used in focus stacking to get the intended depth of field across the aircraft. But at the distance used, even at f/2 the background is not very suppressed. |
At evening time while there is still light, it is quite tempting to try and blur out background buildings by constructing a bokeh panorama. For instance, I have tried using a 105 mm f/2 lens wide open to take a series of overlapping shots of a Typhoon fairly close up, and then stitch them into a panorama. I had hoped that the restricted depth of field with this lens would blur out the building behind. This method is met with limited success (see picture above). Not only that, but I ended up having to effectively focus stack the images because the nearest wing was not the same focal plane as the fuselage. The result was a perfectly satisfactory record of the aircraft, but scarcely worth the effort.
Making use of high and low angles
 |
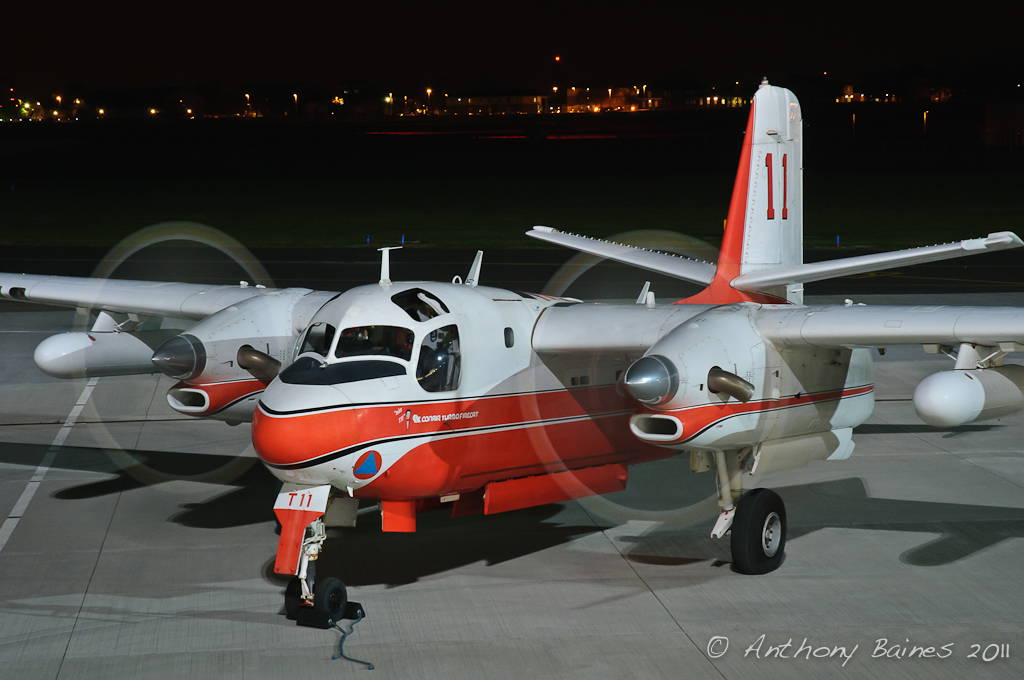
Securite Civile, Grumman S-2A/Conair Turbo Firecat. Air stairs allowed a higher viewpoint.
|
 |
| And from a low angle - an HS125. The low angle helps bring out the reflection. |
Where possible, try and get above or below the aircraft (okay -- statement of the bleedin' obvious). If you are lucky, something like air stairs will be produced. Make sure you make use of them, and don't be afraid to take your tripod up.
Equally, try getting down as low as your tripod will let you, or even balancing your camera on the ground and propping the lens at a suitable angle with a bean bag or anything you can lay your hands on. This works particularly well with reflections of wet ground.
Details
 |
| A Polish Bryza runs its engines |
It's usually worth taking a long a telephoto zoom. Even if you're quite close to the aircraft, a zoom will allow you to get details such as the pilots in situ. You are not always obliged to photograph the full, or even nearly full, subject.
Post processing
There's nothing special about processing night shots, so stick with your usual routine. One thing to bear in mind is that the light from, say, a lamp on a hangar high above your head and behind you will fade off into the distance. This means that the aircraft may well be darker than the foreground. It is often useful to put a gradient of negative exposure on the foreground. (Of course, you could do this in camera by putting an inverted ND grad over the foreground, but I somehow never think of this at the time).
Equally as a way of drawing the viewer's attention to the subject, adding a vignette to the image works well. I often find myself using a stronger vignette with night shots that I do in the daytime.
And that's about it...
Night shooting aircraft is huge fun, and I strongly recommend it to anybody who has any interest in aviation photography.


.jpg)


.jpg)