This is the third post in my series on Photoflying in Belgium. Note that further pictures are available on Pbase.
Parts of this series
Photoflying in Belgium: Part 2. Getting cameras and photographers ready.
Photoflying in Belgium: Part 3. The Academy and Warbird flights
Photoflying in Belgium: Part 4. Flying with Yaks and a Nanchang
Photo flying in Belgium: Part 5. Osa’s Ark
Photoflying in Belgium: Part 3. The Academy and Warbird flights
Photoflying in Belgium: Part 4. Flying with Yaks and a Nanchang
Photo flying in Belgium: Part 5. Osa’s Ark
 |
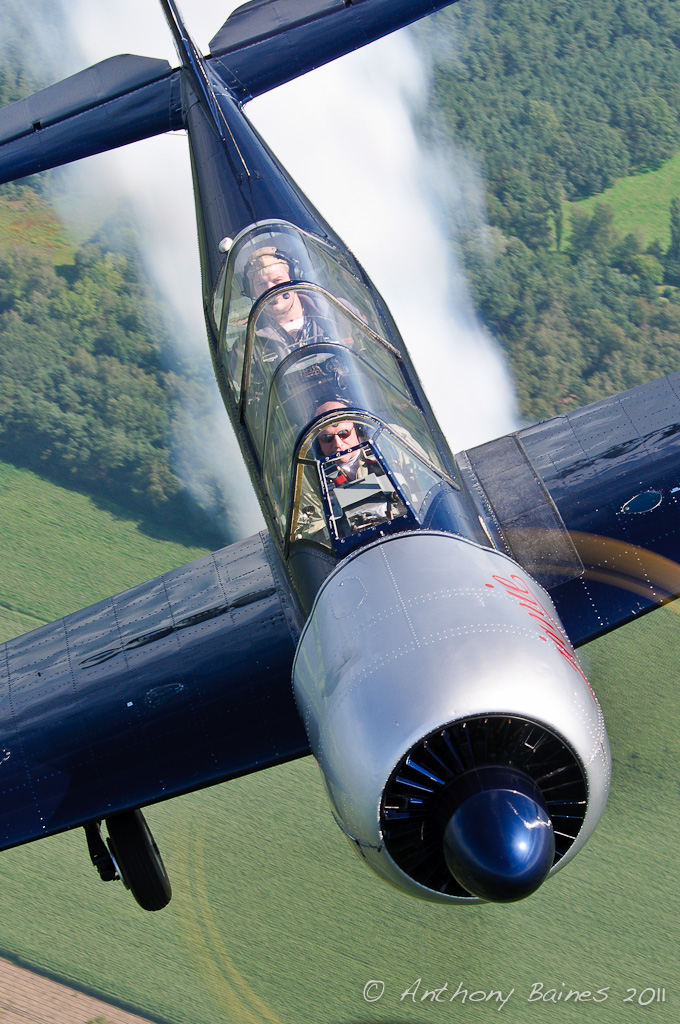
| Scat VII |
Briefing
On the Saturday, it was a 9 AM briefing for the Academy photo flight. Pilots and photographers got together to see the list of aircraft that would be participating, their order and timing; for the pilots, formation speeds, call signs, radio frequency and navigation points were assigned. Then photographers made the half-mile walk to the Skyvan. We were harnessed up, cameras gaffer taped, FOD hazard checks completed, and finally it was into the aircraft.
For takeoff, it is important to balance the weight across the centre of gravity, so half the photographers stayed at the rear, while those in positions 6-11 moved forward on to seats that pulled out from the side of the aircraft. Positions 1-3 have the "interesting" experience of taking off in their final photography positions right next to the open door of the Skyvan, so they see the runway speeding up beneath them and receding as the plane lifts off. Positions 4-5 get to sit on the garden chairs during takeoff, but move into their photography positions once airborne. Positions 6-8 (i.e. including me) sit on the forward pulldown seats for takeoff, but scramble over and into the garden seats to assume their photography positions.
The Academy flight
For me, once the engines of the Skyvan were running, everything seemed to happen extremely quickly. We were off and taxiing, and then all of a sudden the engines ran right up and we were off. I expected us to get to height (about 2000 feet) before any other aircraft came close to us. I did not expect what happened next.
For me, once the engines of the Skyvan were running, everything seemed to happen extremely quickly. We were off and taxiing, and then all of a sudden the engines ran right up and we were off. I expected us to get to height (about 2000 feet) before any other aircraft came close to us. I did not expect what happened next.
No sooner had we left the ground than the T6 was following us: I’d not seen it taxiing out. "S***. It's the T6! F***. Quick get into position! F***!!!" While the aircraft was still climbing, and while the runway was still receding below us, we scrambled into position. I had the same adrenaline feeling that I get standing at the top of a steep ski slope as I moved down the sloping cabin floor to clamber over and into my seat. The churning prop of the T6 was clearly in view during all this, but I was too busy to worry about that.
 |
| T6 |
I started shooting pictures. I had the D300 in CH mode with a 16 GB card in it with the 80-400 lens attached. I also had my daughter's D3100 with the 18-70, again with a 16 GB card. Problem was that I soon realised that I kept shooting the D300 in CH I would use the entire card up on the T6 alone. I quickly made the decision to switch to S, and try just to selectively shoot when the aircraft was that a good angle. Starting at 1/320 I made my safety pictures first. Dropping to about 1/160, I got pictures that I knew would show a bit more prop blur. I tried going to a slower shutter speed still, but chickened out of going really low for fear that the vibrations in the aircraft would blow the pictures. It is difficult to tell by chimping on the rear screen whether or not pictures are really sharp, so even though 1/80 looked okay in the Skyvan, I didn't feel like going to slower shutter speeds. Every so often I swapped between the 18-70 mm and 80-400 lenses, but after a while found I was using the 18-70 much, much more.
After the T6 a number of other aircraft came along in turn -- Super Canard, Commander, Dornier 27, Bulldog, Piper Cub.
 |
| Left to right: Super Canard, T6, Commander |
 |
| Yak-52 "Janie" G-CBSS |
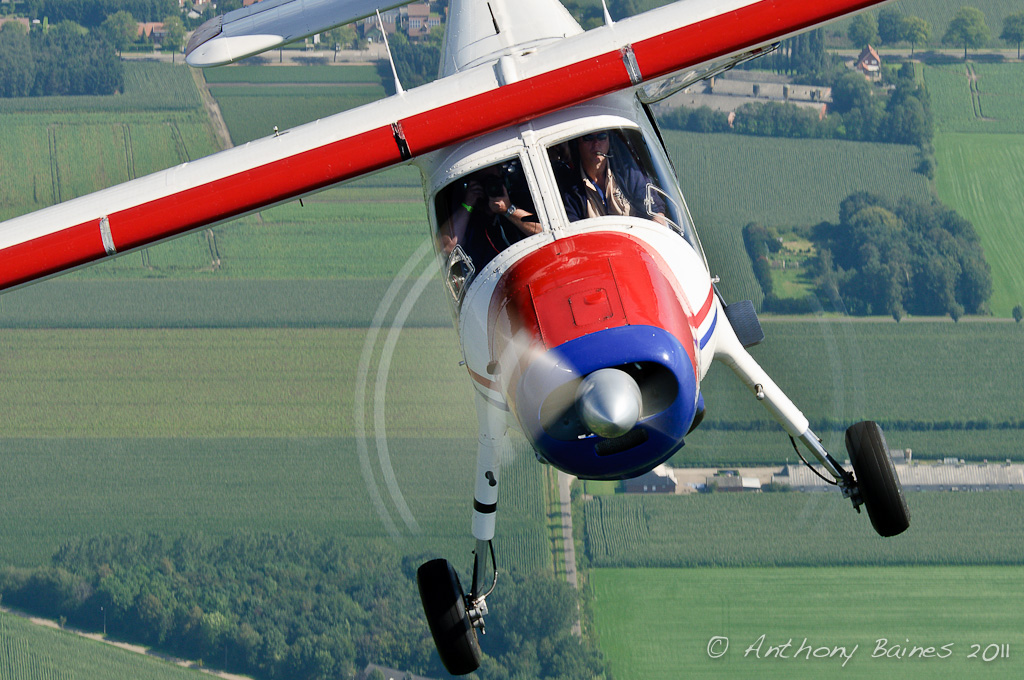 | |||
| Dornier |
 |
| Bulldog |
Some of the other participants in the Academy had got rides in the subject aircraft. I got a nice series of shots of Sonya in the back of the Canard.
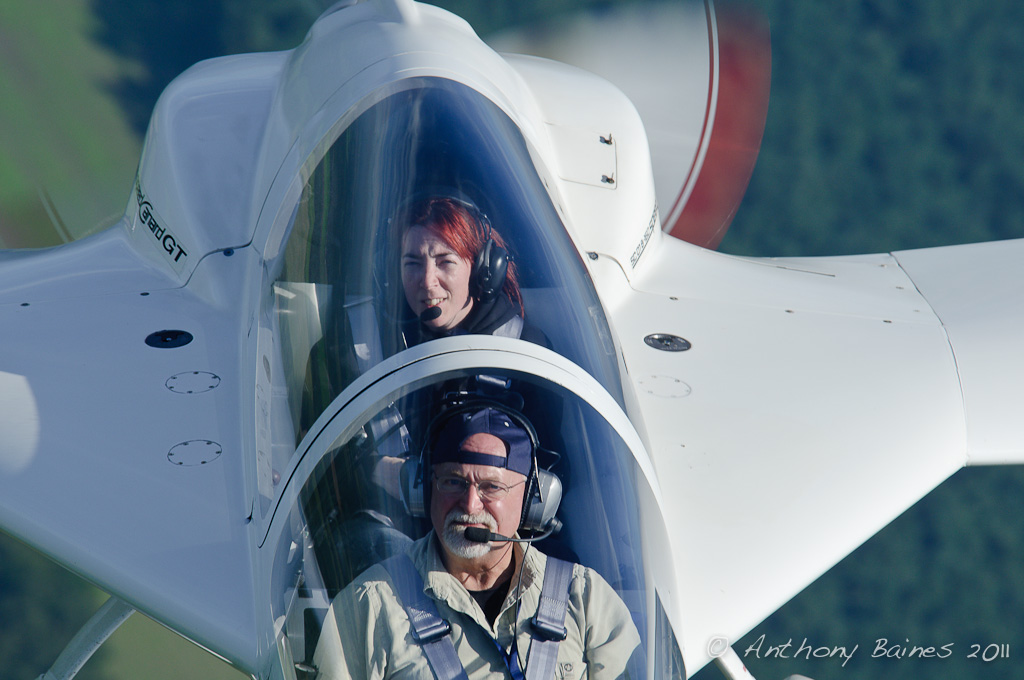 |
| Sonya in the Canard |
 |
| Piper Cub "Alice" |
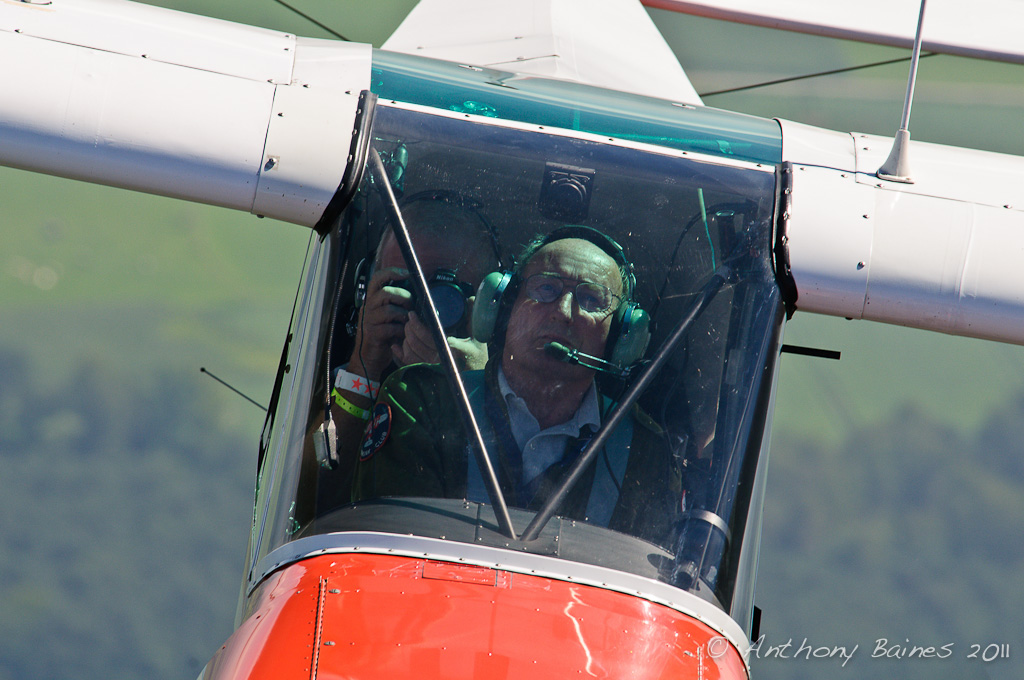 |
| Photographing the photographer ... |
I made a point of not shooting all the time. Guy Westgate said to me some time ago that he wondered whether photographers like me ever put our cameras down, and just enjoyed watching the flying for its own sake. In that spirit, as we turned in the figures of 8, once in a while I just put the camera down, watched the aircraft and enjoyed the snarl of the subject's engine over the noise of the Skyvan's own.
Something I should have anticipated, but didn't, is that flying the Skyvan in formation with, say, a Piper Cub means that the Skyvan is having to fly at a high angle of attack to avoid stalling at the slow speed needed for the Cub to formate. The stall warning beeper sounded quite frequently, and the high angle of attack meant if felt like I was continuously about to fall off my garden chair.
It seemed no time at all, but an hour and a half had passed in a flash and before I knew it, we were heading back to the ground. I had expected to get out of the plane feeling completely drained. But apart from being a bit cramped up from being unable to move, and with eyes a bit tingly from the fumes from the Skyvan's engines as we taxied in, I was fine. In fact, I was desperate to get back up again!
Returning to the Aeroclub hangar for lunch, I met Jean-Michel Legrande who asked if I would be interested in flying in the back of Etienne Verhellen's Yak 52 so that his Yak-18 and the Nanchang could be photographed in formation. They'd never flown together before and he wanted some pictures. Well -- I can resist everything except temptation, and there was nothing more tempting on earth! More on that in a future blog piece, but I've put one of the pictures (with very Wonky Horizon) as the opening picture of this series.
The Warbid Flight
In the evening, with the sun going down and the light getting more and more golden, it was back into the Skyvan for the warbird flight. During the afternoon, I came to the conclusion that I'd do the warbird flight with just the D300 and the 18-70. That lens got the most use in the morning, and I'm comfiest with the D300. Having looked through the pictures, I'm very happy with that decision.
In the evening, with the sun going down and the light getting more and more golden, it was back into the Skyvan for the warbird flight. During the afternoon, I came to the conclusion that I'd do the warbird flight with just the D300 and the 18-70. That lens got the most use in the morning, and I'm comfiest with the D300. Having looked through the pictures, I'm very happy with that decision.
The problem with vintage propeller planes is that they are complex pieces of mechanical engineering, and they can go "tech" at a moment’s notice. So you never know until the plane is behind you what you are really going to get. I had high hopes of a Mustang, but you could never tell in advance. As we taxied out, again with me in the number 8 position, all of a sudden there she was. Scat VII was taxiing behind us, and as we stopped to wait for take-off clearance, she stopped behind us.
 |
| Waiting to fly: Scat VII behind the Skyvan |
 |
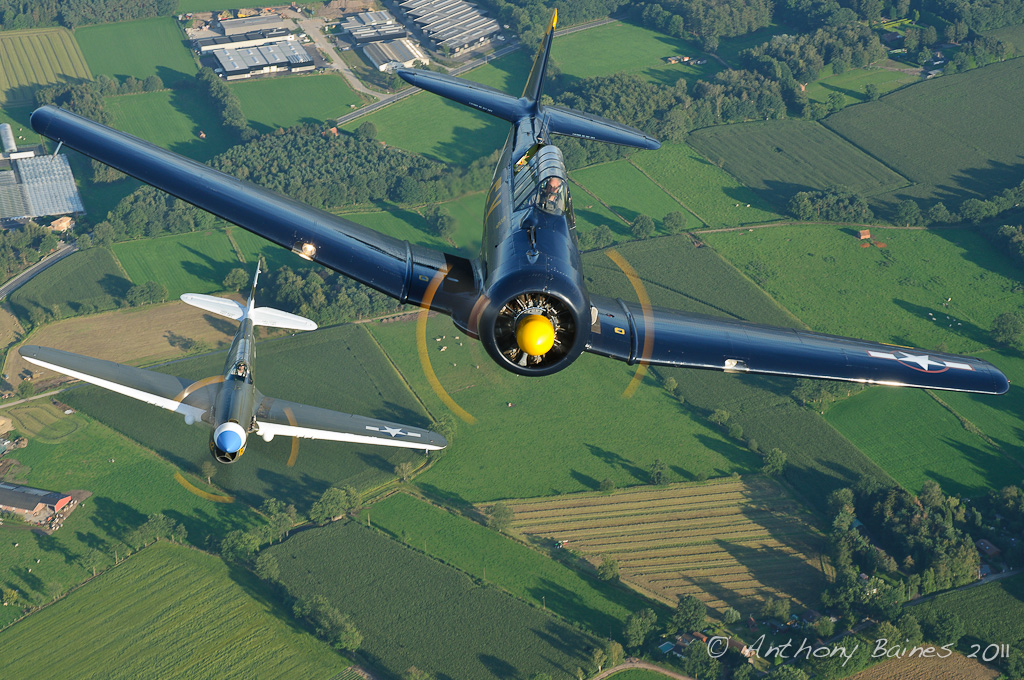
| Evening patrol: TF51D Scat VI and P40N "Little Jeanne" |
 |
| P40N "Little Jeanne" |
 |
| Skyraider |
 |
| Smudgers at work on the T6 |
 |
| T6 texan and P40N Little Jeanne |
 | |||
| Yak-18 |
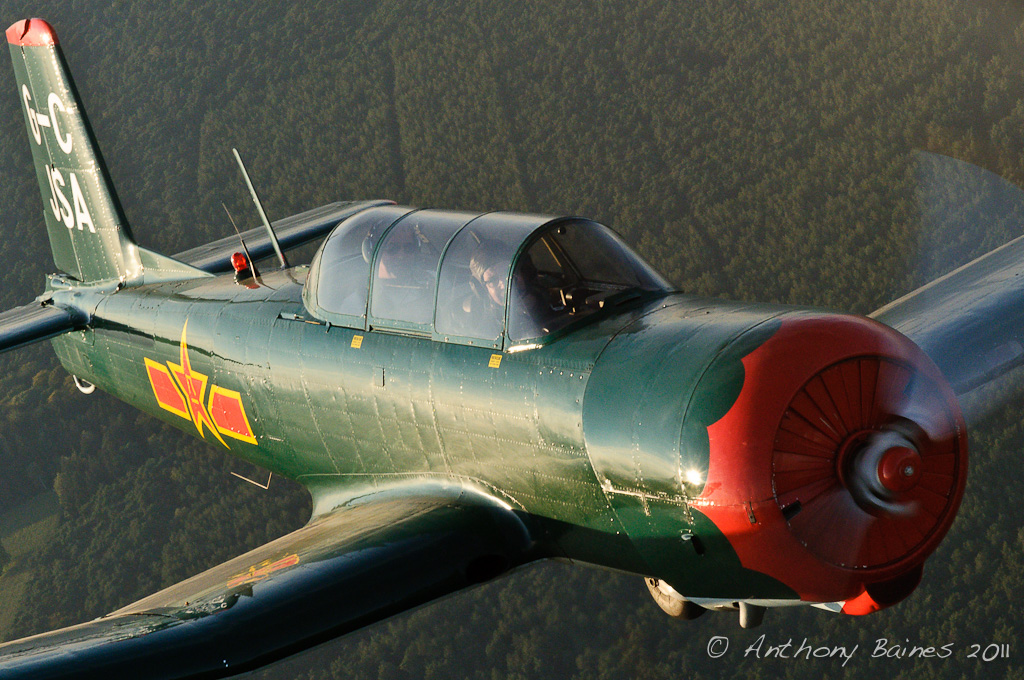 |
| Nanchang NAMC-CJ-6A |
Finally, the last aircraft of the day -- up came the Sikorsky S38 Osa's Ark. The sheer rarity of that experience alone, flying with the Ark, made the fee for the flight cheap at the price.
 |
| Osa's Ark Amphibious Sikorsky Aircraft |
As before, before I knew it we were back on the ground. It had been just the most wonderful experience. For me, it was the perfect example of "close" to, and "in front of more interesting stuff".
Talking of interesting stuff, I’ll put up a couple more pieces in this series next week on Flying with the Yaks and a Nanchang, and on Osa’s Ark. More to come ....


