Showing posts with label Tutorial. Show all posts

Saturday, 23 March 2013

Aircraft at night: post-processing


Fig. 1. Armee de l'Air Alpha Jet at RAF Northolt, March 2013
I have previously blogged about taking pictures of aircraft after dark. I went on another night shoot at Northolt last Thursday evening, and thought I would use a picture from that session as a follow-up to my previous blog piece, turning this time to my approach to post-processing.

Parenthetically, I won't put too many pictures from that session here: if you are interested, the set is on Flickr.

The picture at the top of this post (Figure 1) is one that seems to have gone down quite well on Flickr. It shows a French Alpha Jet: notice the pilot's helmet hanging on the side by the cockpit. I'll talk you through my approach to postprocessing this image using Lightroom.
Fig. 2. Original of the image shown in Fig. 1.
Here is the original image, without any alterations (figure 2). It looks pretty ghastly. The night sky looks like West London is some kind of hellish inferno, and the overall contrast is rather low. It was shot with my 18-70 mm lens on the D300, with the zoom was at its longest setting (70 mm). Because I couldn't get any closer, the framing is loose, but it gives me the opportunity to crop to the shape I like, and , in any case, gives a sense that the aircraft can move in the frame. The horizon is – of course! – a little Wonky; however, that's easy enough to correct.

The good thing though is that the exposure on the aircraft itself is pretty much correct. Nevertheless, you'll also notice the nature of the exposure. It looks hugely overexposed, with nearly burnt out foreground, and sky that is way too bright for the night. But the reason is exposed like this is to get light from the shadows under the aircraft.
Fig. 3. The histogram for the original image.
The histogram (Fig. 3) is very ugly, but it shows that I have chosen an exposure that retains data all the way across the brightness range: neither the blacks are blocked up, nor the highlights are badly blown (there is a tiny blip at the very highest exposure data point, but that is from the lights in the background, and there's nothing that can be done about them). So, odd as it may look the exposure was exactly the way I wanted: this is an example of the "expose-to-the-right" method. I might also point out that the exposure was 30 sec: there's really not that much light there, and the picture is way brighter than it looked to the eye.

Evaluating this picture, there are several things that need to be done. First of all, a decision has to be made about the crop: do we give the aircraft space to move, or do we crop in tight? Whatever, the horizon has to be levelled, there's a couple of distracting cars in the background that can go (I make no apology for that: those cars would drive away at some point anyhow). How about the white balance? The lighting is a mixture of sources, so we'll need to think about the overall balance put on the aircraft. And then there's the whole problem of the bright sky and foreground. The sky does not look the way I remember it – the long exposure has brought out all the lights of London glaring on the dusty sky, and at the very least that needs to be corrected. But more than that, the classical way that the eye moves across the picture is that it is drawn from dark to light. So I wanted to keep the aircraft comparatively light while darkening with the sky and the foreground to draw attention to the subject. The image is also quite low contrast, and adding a bit of Clarity should perk it up.
Fig. 4. Import preset applied, and cropped/levelled.
I have a preset that is applied during import into Lightroom: this applies +40 Clarity, +20 Vibrance, as well as some heavily masked capture sharpening, and the Camera Standard version 4 profile. The lens correction profile is also applied by this preset. Figure 4 shows the image after import with this preset applied and cropping plus levelling the horizon. It immediately looks a bit better. That preset is one I regard as my starting point for processing a picture to be modified as required, but in this case I think it works fine and clarity/vibrance don't need further adjustment.
Fig. 5. Sky and foreground darkened
Fig. 6. A little positive exposure painted on to the aircraft.

The next thing is to darken both foreground and the sky. This is done by applying negative exposure adjustments on gradient fills in Lightroom, and also painting in some negative exposure around the undercarriage. I added an additional small darkening vignette. The result is shown in Figure 5.

Having looked overexposed originally, the image now looks more or less fine, but if anything I would like to add some luminosity to the aircraft itself, again to make it pop into the viewers vision. Figure 6 shows the result of applying a positive exposure adjustment with a brush over the aircraft.

At this point, having got the overall look more or less the way I want it, we can look at the white balance. The problem with trying to adjust the white balance earlier is the strong effect of the sky on the image makes it difficult to evaluate what the final look should be. So I left it until this point to fine tune the white balance. The shot was taken on auto white balance and bearing in mind the nature of the mixed lighting it has done a remarkably good job. I've tried adjusting the white balance, but in the end I think I prefer it as shot.

The final step is to clone out the cars and a few tiny distractions in the background.  The picture at the top of page (Figure 1) shows the result.

Although this is a very particular example of my approach, the general philosophy for night shoots applies throughout. 1 – expose to the right. 2 – the eye moves from dark to light, so draw attention to the subject by darkening the area around it. 3 – think about the white balance: even though your camera probably does a very fine job in mixed lighting, it may not give you the results you want, so fine tune it to your taste.

Sunday, 24 February 2013

Two years with wireless flash triggers

Transmitter and receiver. The wireless transmitter (left) is shown sitting on a camera  hotshoe. The receiver (right) is attached to a light-stand by a tripod-style screw attachment; a speedlight sits on a hotshoe on the receiver.

We don't do much on equipment on Wonky Horizons, but I'm making an exception here. This is not so much a review, but a commentary about two years experience with a set of inexpensive wireless flash triggers. I have mentioned these in a previous post, so this is by way of a follow up.

My Nikon D300 and D700 both have a pop-up flash that can be used to control an external flash, and send exposure commands to it. This is a great way to make lighting a subject using flash more interesting by moving it away from the camera. This is part of the Nikon creative lighting system (CLS) that allows full automation of flash exposure.

However, soon after I began using it with an SB900 speedlight (usually firing through a shoot-through umbrella), I realised a serious limitation. There is a tiny lag (only milliseconds) between the commander flash going off and the external flash firing. The delay is just long enough to allow the subject to close their eyes. My daughter, for instance, has the most amazing blink reflexes: pretty much every time I tried to use the pop-up flash as a commander she would blink, so every picture came out with closed eyes. I also think it is a bit unpleasant to have a hard small flash go off in front of your eyes during any extended portrait session.

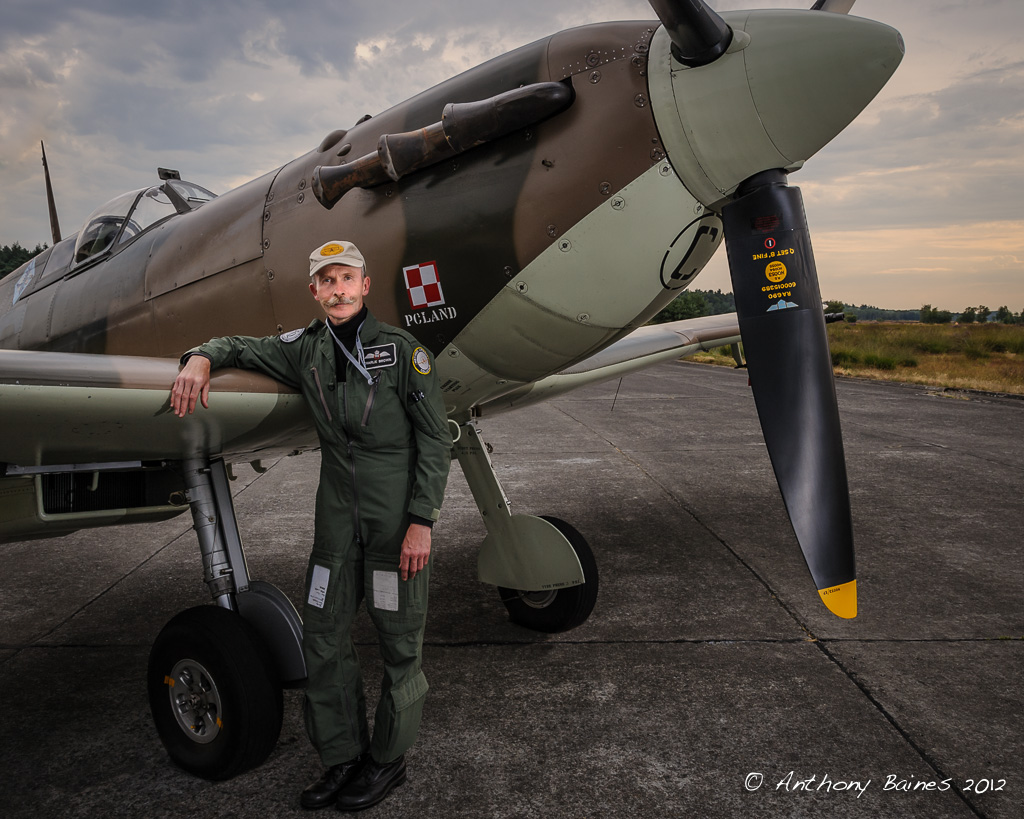
Charlie Brown, Spitfire pilot, with BM597. He and Dave Harvey (below) had flown in from Russia via Poland  to Belgium. He very kindly posed with his aircraft for a quick portrait. I added a little light from the SB900 held by another photographer acting as a voice-activated light stand camera right, triggered by the Yongnuo. The added flash makes all the difference to the picture by lifting Charlie from the shadow of the plane, while not over powering the remaining daylight. Camera and flash set to manual exposure.
I had been thinking about getting a wireless trigger for a while when I came across a video by Gavin Hoey, where he used a Yongnuo trigger. These are extremely inexpensive compared to top of the line Pocket Wizards, but, if they're good enough for Gavin Hoey, they should be good enough for me. I actually had the chance to talk to him briefly about them: he was very enthusiastic about them, and said they had been good value for money for him up to that point. So I ordered a set from Amazon.

The device consists of a transmitter (mine is a Yongnuo RF-600TX) that sits on the hot shoe of your camera, and a receiver/trigger (Yongnuo RF-602RX) that has its own hot shoe that attaches to the flash. There is a tripod screw mount in the base of the receiver, so the flash/receiver combination can be attached to the top of a light stand or into a umbrella/soft box support.
Dave Harvey, Hurricane Pilot.  Same set up as above, but a few minutes later, with the sun setting fast. Again, the SB900 was held camera right by a VALS (thanks, Daniel!)

In operation, they are simplicity itself. Switch on the flash and the trigger, and you're ready to go (the transmitter communicates with the hot shoe and doesn't have an on/off switch). The transmitter takes a CR2 battery, and the receiver one AAA. The set I got from Amazon had the batteries with it.

There's almost nothing more to say – they just work. Of course, the downside is that you lose the CLS control of the flash. That's to say the expensive, smart SB900 becomes a dumb slave flash. Bummer. But actually, in real life, this has been much less of an issue than I had anticipated. Having grown up with manual flash it's really not a big deal as far as I'm concerned for the kind of simple stuff I do. The SB900 has a very straightforward manual output power control: this means that it is very simple to set the power output to match the desired exposure. I usually work with the flash set to somewhere between 1/8-1/2 power to get a reasonable balance between short recycling time on the flash, and adequate control of aperture.

The range of the wireless signal is more than I'll ever need. I've no idea what the maximum range is: I've tried it over about 60 metres, and it worked fine, and that is far more than I've ever used in serious work.

One more thing to mention is that my son took them over for his A level photography work.  He liked them so much that he bought a set for himself to take with him to University. His Flickr stream shows he makes a lot of use of them.
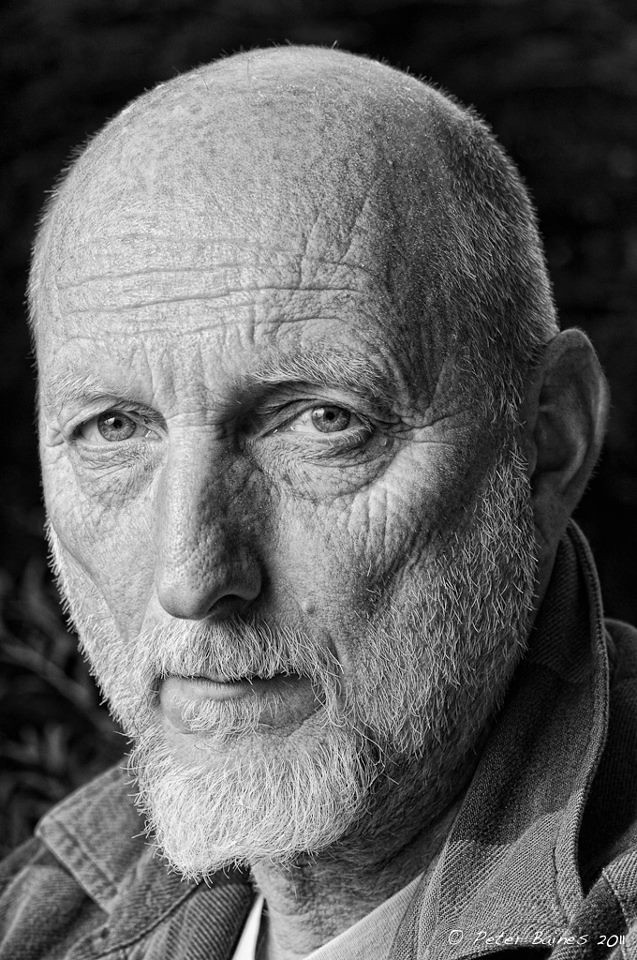
From Peter's A level portfolio. For this one, the subject (who shall be nameless!) was lit camera left, through an umbrella outside in the garden, again triggered by the Yongnuo. Picture by Peter Baines.
After two years, all I can say is so far so good. They've worked first time, every time, up till now (says he, furiously touching wood!). Of course, I don't make very heavy use of them, and if I made my living using flashes, a set of Pocket Wizards would be a no-brainer.  But for me, these have been a great value purchase.

Tuesday, 11 December 2012

Heavy breathing in Nikon land

My old 135mm f/2.8  AI-S lens: still working, despite being breathed on
There has been much harrumphing on the forums this week in the wake of some technical advice from Nikon about cleaning lenses that was unearthed and posted on Petapixel. The advice was quickly reposted on several other blogs and forums, including Nikon Rumours, Photography Bay and DPreview. It runs ran as follows*:
How do I clean the camera lens?
The best way to clean a lens is to use a piece of lint free lens cleaning tissue and a small amount of Lens Cleaning solution. Do not use anything containing abrasives or  solvents, only use Lens Cleaning Solution.
First we recommend taking a small blower brush to blow off or brush away loose dust or debris.
Next, place a drop or two of cleaner on the tissue (never directly onto the lens) and then wipe the lens in a circular motion, beginning in the center and working your way outward, removing any marks or smear.
If the above supplies are not available a clean, dry, soft, lint free cloth can be used to clean the lens. Do not breathe on the lens to fog it for cleaning. There are harmful acids in breath that can damage lens coatings. Just use the blower bulb, then brush, and wipe the lens in a circular spiral from the center outward.
The same method can be used to clean the viewfinder eyepiece of Nikon cameras.

Read more on NikonRumors.com: http://nikonrumors.com/2012/12/07/nikon-support-do-not-breathe-on-your-lens-to-clean-it-your-breath-contains-harmful-acids-that-could-damage-the-lens-coating.aspx/#ixzz2EmKDsDB2
This leaves me in a bit of a conundrum. First of all, I've been using the "breathe on lens and wipe it carefully with soft lens cloth" technique for cleaning lenses for longer than I can remember, and certainly for more than two decades. When I first bought an SLR, I started to use lens cleaning fluid – much as recommended in this advice – and found it tended to leave smearing. In fact, the cure was often worse than the condition. I quickly went over to gently breathing on the lens, and using the condensate with gentle wiping: this has been much more satisfactory, and is my standard method to this day.

The second point is that far from being acid, I've always been led to believe that exhaled breath is actually slightly alkaline. (In case you've forgotten, pH 7.0 is neutral, lower numbers are acid, and higher numbers are alkaline. Wikipedia explains it clearly.)  A quick PubMed search confirmed this. Almost all breath from healthy people is slightly alkaline. There are some disease conditions in which the breath becomes acid (e.g. some infectious and inflammatory diseases), but most healthy people don't have acid breath.

One caution though is that before measuring the pH, samples are usually flushed with argon to blow off any dissolved carbon dioxide. So, in principle, there could be some variable amounts of carbonic acid in anybody's breath.

The thing is though, that dissolved carbon dioxide is a characteristic of any normal watery sample. So if your lens ever gets any condensation on it (e.g. bringing it back into the house after a walk on a cold morning), it could in principle be exposed to carbonic acid. Worse still would be rainwater, which usually has a pH somewhere between 5.0 and 5.6, but may get down as low as 2.0 ("acid rain").

Traditionally, lens coatings have been based on components such as magnesium fluoride and silica. These are pretty inert compounds, and it takes something like nitric acid (a strong acid) to dissolve magnesium fluoride. Carbonic acid (pKa ~ 6.4) is a weak acid. Now, I have no idea what Nikon use in their latest Nano-Crystal coating, but I would be amazed if it was any less inert than these kind of compounds.

So what to do? In general, I always try to go with the manufacturer's recommendations for any product. They're the ones who have spent time and money developing the best methods. But just for once, in this instance I am going to carry on doing what I've done for decades. It's probably true that a professional photographer with a medical condition that gives acidic breath, who needs to clean a lens several times a day, may progressively degrade it with the heavy breathing method. However, my experience over decades has been that moderate amounts of exhaled condensate are sufficiently safe for me to carry on as usual. Nevertheless - breathe on your lens at your own risk!


~~~~~~~~~~~~~

*Update 11 Dec 2012, evening: the underlined bold advice on the support page has now disappeared. The acid prohibition has now gone! I wonder why?

Thursday, 6 December 2012

Photographing aircraft at night

Spitfires at the Biggin Hill Heritage Hangar

Modern digital SLRs lend themselves to photography not just during the day time: given the astonishing ability of current sensors to convert just a few photons into a good image, the prospect of photographing anything – even flying aircraft  – at night has become a reality. Not only that but the ability to chimp on the back screen to check exposures means that shooting at night has become easier and much less hit and miss. This blog piece is about photographing aircraft in twilight, or after dark, and relates primarily to photographing them static, and with good access to an airfield.

Organisers of aviation-related events are beginning to understand the demand from photographers for pictures that are different from standard air show fare. Once in a while there are opportunities to shoot on an airfield at twilight and after dark, albeit in dim conditions with only the light from hangers to illuminate the aircraft.

As an alternative, if access to an airfield can be arranged, light painting now offers a realistic option of getting views of aircraft that are both dramatic and different from the run of the mill.

At organised nightshoots, the aircraft are usually static with engines switched off. However, sometimes the pilots of propeller aircraft can be persuaded to run their engines, the corresponding slow exposures yield prop circles. Occasionally, it is possible to photograph a helicopter hovering by hangar light.

Over the last two or three years I've done quite a bit of night shooting at airfields. There's a few hints and tips that I've worked out over that time that I thought I should share here. But I'll give the quick summary anyway if you haven't got time to read everything below.

Actually, it's really not very hard. 90% of it can be summed up as follows: shoot Raw, at best quality ISO, use a tripod with good technique, check the exposure both on the histogram and the blinkies. Don't use flash, unless you are light painting a static aircraft: flashes are dangerous on airfields as they can damage night adaptation of flight crew's vision. That is really is most of it.

Having said that, I'll expand a bit more detail.
Including people often adds interest. Note also that the exposure range here is quite large: careful metering is required to keep details in the dark and light areas of the picture. Shooting RAW is a big help in this.

Use RAW

Night shooting is one of those occasions when the real benefits of RAW make themselves felt. With RAW images, it's possible to change the white balance in post-processing with minimal compromise to the quality of the image: this is something that is essential in night shoots where you're likely to be dealing with mixed light sources. Equally, the dynamic range of the subject tends to be huge, from brightly lit up top surfaces to deep shadows under wings: recording images at full 14 stop range gives the best chance of revealing the details of both.

Use a tripod

 Clearly, shooting at night means that generally you have to expect very little light even with hangar lights illuminating the subject. To get the highest quality image, it is best to use base ISO (ISO 200 on my Nikon cameras, ISO 100 on many Canon cameras): shadow areas under wings, for instance, can be very dark indeed, and it is in the shadows that noise lurks; using base ISO is the way to minimise shadow noise. In general, exposures tend to be in the range 2-20 seconds, so a good tripod is essential. (I take the Thom Hogan view of buying a tripod: I am amazed at the number of people who bring spindly cheap things along to night shoots and then put expensive DSLRs and heavy lenses on them). If you get a lot of people in a small area at a night shoot, tripods tend as much trip hazard as camera support, but they are essential anyway. And don’t forget to use a remote/cable release for the shutter, and mirror lock up or delay to minimize camera vibrations.
Errr ... not actually a nightshot, but in the evening beforehand. High viz vests and trip hazards abound on this airfield.

... Or don't use a tripod

Having said that, it is now becoming possible to use a camera without a tripod. Some of the Sony DSLRs have a multiple exposure noise reduction mode, where multiple pictures are taken at very high ISO and then averaged to minimise the noise and increase definition. One photographer at a recent shoot standing next to me did everything by hand with his Sony: the camera gave rapid whizz-whizz-whizz sound as it took multiple images. It seemed to work extremely well, judging by pictures he posted afterwards.
Handheld at f/1.4
And there is one other choice too: a fast lens and high ISO. If you are lucky enough to get something like a helicopter hovering by hangar light, the only way to photograph it in flight is to use a reasonably fast shutter speed. At a recent night shoot, I took along my 50 mm f/1.4 lens: I set the D700 to ISO 3200, the aperture wide open, the camera to aperture priority exposure and crossed my fingers. This gave me exposures around 1/40th second which was just about OK for getting hovering helicopters.

Having said that, I still wouldn't recommend anything other than using a tripod to both support the camera and help you with control and composition.

Metering and exposure

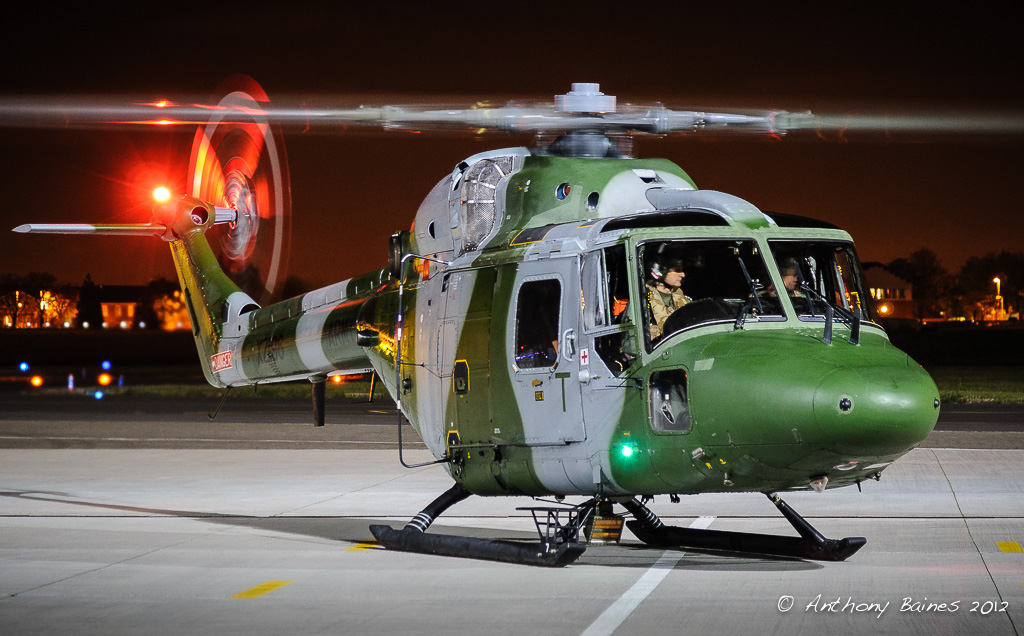
It is very easy to lose shadow detail: this Lynx was given +0.67 stops exposure compensation to prevent this
Metering at night can be quite difficult. Ideally, it's good to "expose to the right", i.e. get as much light into the exposure as possible without blowing the highlights. But aircraft often have specular reflections from artificial lights, so these can confuse the evaluation of exposure.

Usually an aircraft is illuminated by something like hangar lights which give a bright foreground, but then the light fades off quickly so that the sky, and any background is dark. Aircraft themselves may be painted anything between white and black, so it's very difficult to establish a general rule for how to choose and exposure.

My general approach is to begin with standard matrix metering and aperture priority exposure mode. I'll start with a preliminary exposure without any compensation, and then look at the histogram and any blinking highlights in the display on the back of the camera. From there, I'll dial in exposure compensation to increase the exposure until the highlight warning starts to blink.  There's often very bright reflections on small parts of the aircraft where any illumination reflects directly at the camera. Usually, it's impossible to do anything about these, so normally I'll accept small areas of blinking highlights on the camera's display, in order to get sufficient exposure that detail is nicely revealed in shadow areas.

Typically, I'll end up with +1-+2 stop exposure compensation.

I normally work in aperture priority mode to ensure that I get the depth of field I want across the subject. Once the exposure was worked out in aperture priority, it can sometimes be useful to go into manual mode and lock in that exposure: artificial lights shouldn't change, so the exposure doesn't need to change.
The Martin-Baker Meteor. How would you meter for this?
For really difficult subjects, like a black-painted aircraft (like the Martin-Baker Meteor), you could spot meter and set the upper fuselage in, say, Zone II: let me know how it goes if you ever try it!

White balance

In general terms, it should be possible to set a fixed white balance to go with the colour temperature of the lights illuminating the subjects. On my first night shoot, I thought I would bring along a grey card and use that to establish a white balance, which could then subsequently be applied to all the pictures. In practice, it has never worked out like that. The lighting always tends to be rather mixed. At some places, the hangar light is pretty close to daylight balanced; but in the background that maybe sodium lamps. This can give rather horrid effects that vary from place to place on an airfield.

It is much simpler to set an auto white balance the camera. Auto white balance these days does amazingly well, and I find it simpler to tweak the white balance in post processing than worry about trying to set an exact white balance at the time.

Choosing shutter speed and aperture

f/11 gave enough depth of field for this Tornado, and it didn't wander off during the 15 sec exposure :-)
 Aircraft have depth to them, and if you're reasonably close to them only to consider and aperture the get some sharp all the way across if that's what you want. Often, it's convenient to work at about f/11, because typically that gives sufficient depth of field, without much in the way of diffraction effects reducing resolution. However, that aperture is a real restriction on the amount of light getting in and even with good lighting, at ISO 100 or 200 and exposure time will be several seconds.

Long exposures are normally not a problem at night shoots. Static aircraft don't get fidgety, so it really doesn't matter how long the exposure is. Not only that, but when aircraft are running their engines, the propellers make attractive circles with long exposures.

The limitation of long exposures is when people are in the image or an aircraft is actually flying. People are really difficult, because a pilot checking out an aircraft, for instance, will never stand still. If you want to freeze the human, there's no option but to open the aperture and increase the ISO.
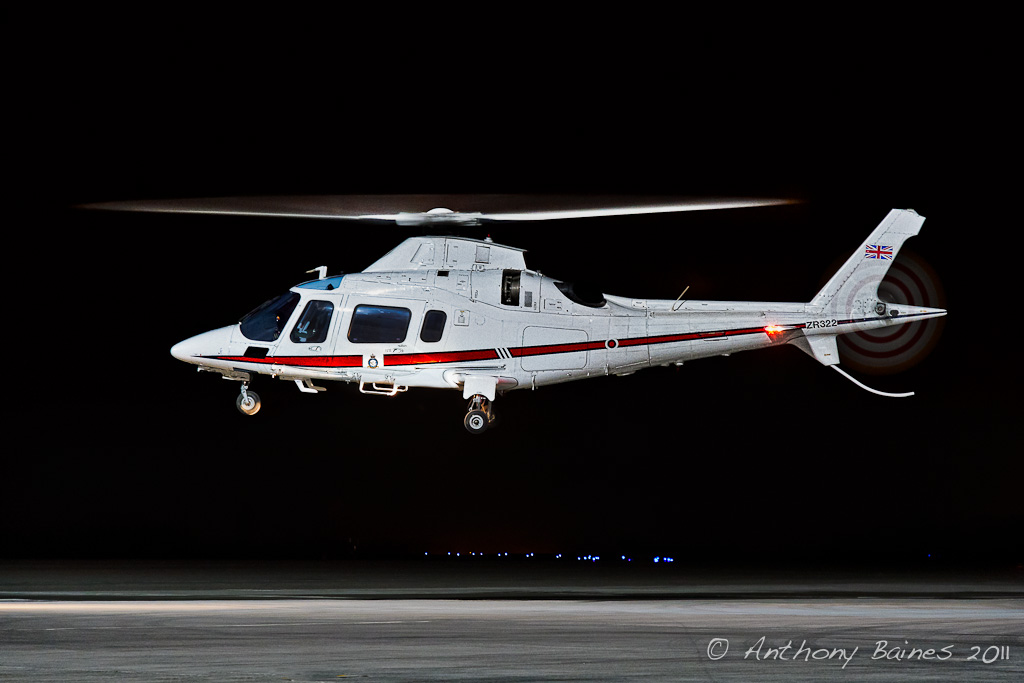
If you're lucky, 1/10th second exposure can be OK. AgustaWestland AW-109E.
Hovering helicopters also offer a challenge. As long as they are not moving very quickly, exposures around 1/40 are about right and that can be got on most recent cameras simply by turning up the ISO and using the fastest lens you have got.

Framing and composition

This is a matter of personal taste, so I won't comment on this much. However, don't be afraid to include sky in a picture, because that's where aircraft are really meant to be. Even when they're static, it is good to give the impression that they can move forward by leaving space in the picture where they can move into. (It is probably different if you are going to submit your picture to one of the aircraft databases because they like everything cropped very tight; however for most other purposes it's good to give the aircraft room to move).

Night skies, certainly here in the South of England, are rarely completely dark. There's usually a deep orangey-brown glow from reflected street lights in the distance. Not only that, but very often night shoots will actually begin in late evening when there is still light in the sky.

Graduated Neutral density filters for evening shoots

The Kent Spitfire, TA805, in a pool of hangar light as evening falls. the sky was brought out with a 2 stop ND grad. This picture was a UKAR Picture of the Week.
 Evening shoots in particular benefit from bringing out the details of the sky. Aircraft tend to be much darker than the sky, so it's useful to bring the sky down by using a graduated neutral density filter. I often use a 2-3 stop Lee hard grad for this. Shooting Raw means that you have a chance of doing this in post anyhow, but I find that adding an ND grad makes this much easier, with much less fiddling needed in post, and a better range of tones available anyhow.

Things to look for

Flames from a Merlin engine
 Engines, especially on vintage aircraft, often emit blue flames from the exhausts which become visible after dark when they're running. This gives a real sense of drama to the image. Unfortunately, they don't emit these very consistently, say have to be prepared to take multiple exposures, each of which will be several seconds, to ensure getting the blue flames.

Checking over his Alpha: a French pilot inspects his cockpit


Watch out for the activity of aircrews. They will often go out of a plane, check it over, and carry out other activities before getting in. It is often quite possible to capture the activity of crew members in this way, and this gives a bit of extra life to the image.
Typhoon on tow
The same applies to the activity of ground crews. Be prepared for aircraft be towed in and out of hangers: this often provides good opportunities for capturing the life of the airfield. (It scarcely needs saying, but be prepared to get out of the way when an aircraft is towed – don’t wait to be asked – or run over).

When it is raining (or if some water has very kindly been poured onto the ground ☺) It's possible to capture very nice reflections. Watch out reflections, and consider including them in your image.

Backgrounds

Backgrounds are always a bit of a problem with night shoots. Very often there are ugly sodium, fluorescent or tungsten lamps that shine brightly across the other side of the airfield. This can be very distracting from the subject. The only thing to do is to watch out for them, both when composing the image initially, and when chimping. You can sometimes move position, or choose a higher or lower angle to conceal the worst behind the subject. It rarely helps to open the aperture wide. Even at f/1.4, given the distance between the subject and the camera, the depth of field is great enough that distant lights still form relatively compact spots rather than disappearing in elegant blur.


Focus-stacked bokehrama of a Typhoon: not a night shot, but in the evening, anyhow :-). 105mm at  f/2.  
5 portrait format images in a row, blended into a pano, and then further rows used in focus stacking to get the intended depth of field across the aircraft. But at the distance used, even at f/2 the background is not very suppressed.
At evening time while there is still light, it is quite tempting to try and blur out background buildings by constructing a bokeh panorama. For instance, I have tried using a 105 mm f/2 lens wide open to take a series of overlapping shots of a Typhoon fairly close up, and then stitch them into a panorama. I had hoped that the restricted depth of field with this lens would blur out the building behind. This method is met with limited success (see picture above). Not only that, but I ended up having to effectively focus stack the images because the nearest wing was not the same focal plane as the fuselage. The result was a perfectly satisfactory record of the aircraft, but scarcely worth the effort.

Making use of high and low angles

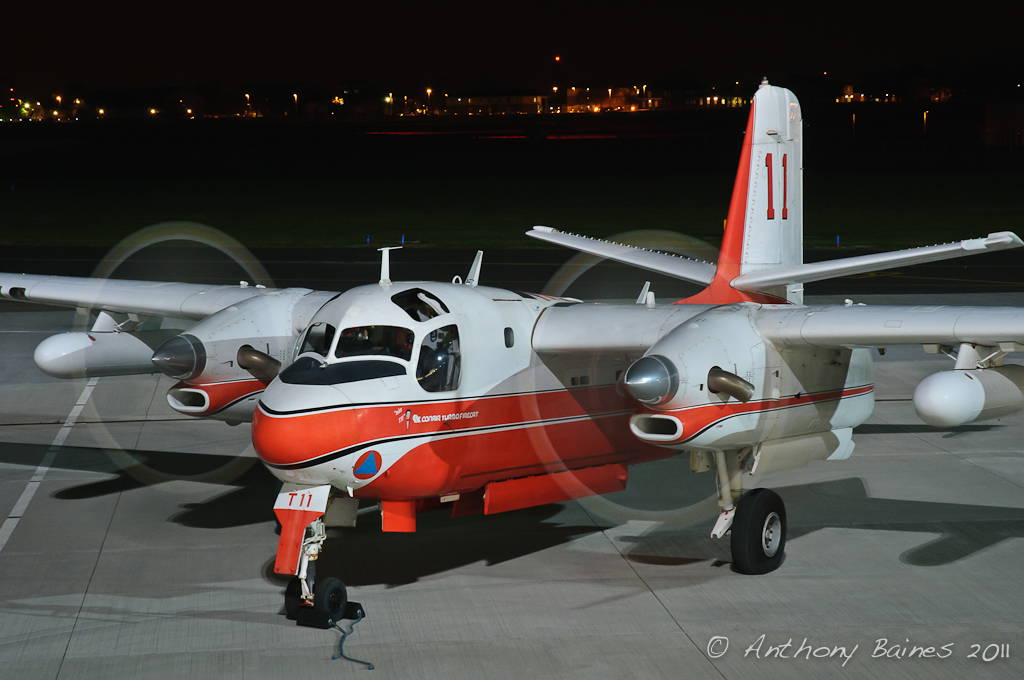
Securite Civile, Grumman S-2A/Conair Turbo Firecat. Air stairs allowed a higher viewpoint.

And from a low angle - an HS125. The low angle helps bring out the reflection.
Where possible, try and get above or below the aircraft (okay -- statement of the bleedin' obvious). If you are lucky, something like air stairs will be produced. Make sure you make use of them, and don't be afraid to take your tripod up.

Equally, try getting down as low as your tripod will let you, or even balancing your camera on the ground and propping the lens at a suitable angle with a bean bag or anything you can lay your hands on. This works particularly well with reflections of wet ground.

Details

A Polish Bryza runs its engines
It's usually worth taking a long a telephoto zoom. Even if you're quite close to the aircraft, a zoom will allow you to get details such as the pilots in situ. You are not always obliged to photograph the full, or even nearly full, subject.

Post processing

There's nothing special about processing night shots, so stick with your usual routine. One thing to bear in mind is that the light from, say, a lamp on a hangar high above your head and behind you will fade off into the distance. This means that the aircraft may well be darker than the foreground. It is often useful to put a gradient of negative exposure on the foreground. (Of course, you could do this in camera by putting an inverted ND grad over the foreground, but I somehow never think of this at the time).

Equally as a way of drawing the viewer's attention to the subject, adding a vignette to the image works well. I often find myself using a stronger vignette with night shots that I do in the daytime.

And that's about it...

Night shooting aircraft is huge fun, and I strongly recommend it to anybody who has any interest in aviation photography.

Tuesday, 9 October 2012

Panning for abstracts

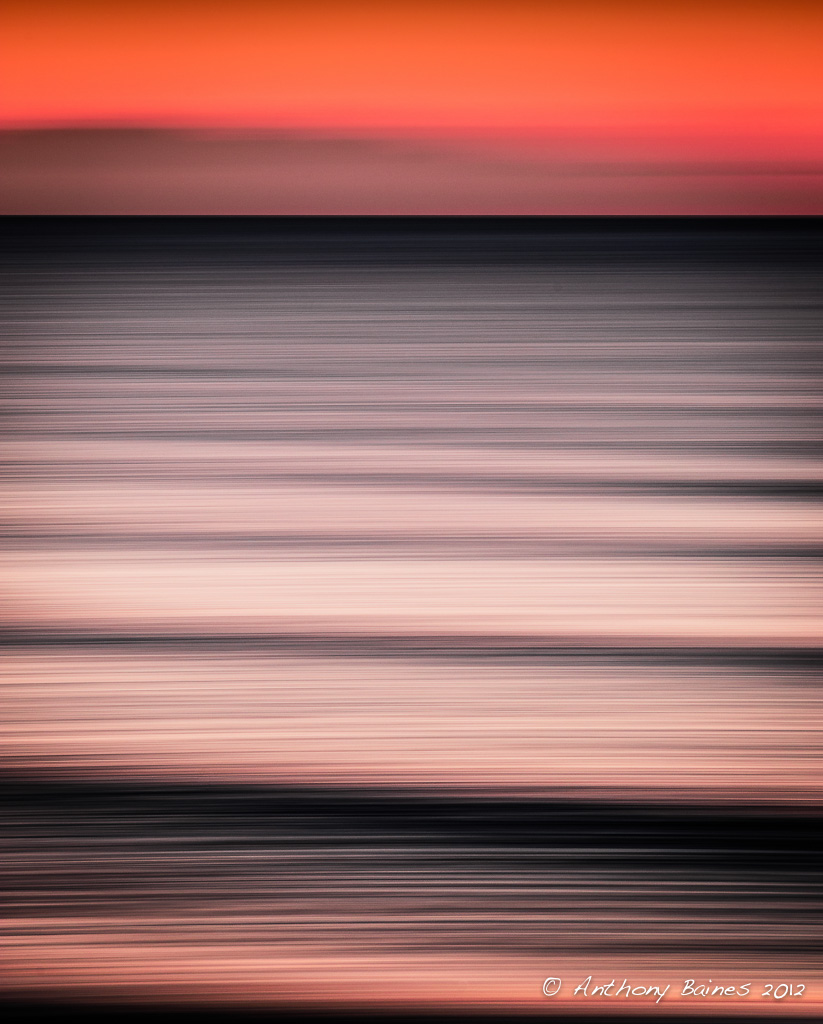
Dawn over the English Channel, in abstract


One of the things that I enjoy is to try to simplify the subject to the point where its essence can be abstracted. It's possible to create an impression of the subject that almost discards the original and yet leaves the intrinsic rhythms intact.

One approach is to pan the camera with a slow shutter speed across a static subject. This removes details, and yet, done correctly, leaves behind the rhythmic elements that can define the subject's intrinsic nature.

Many years ago, in film days, I used occasionally to try panning the camera on static subjects to get this impressionistic view. It never really worked for me. I now realise that the constraints that we all felt with the expense of film (especially colour slides) meant that I never worked at it hard enough.

Yet another of the benefits of digital is the ability to take a lot of pictures and really work at a subject at essentially no cost. Reviewing and refining the method of panning while working on a picture helps enormously, and this can really only be done with digital.

Over the past few years, I have occasionally tried this again; here are a couple from this year that I quite like. Both of these required a reasonable amount of work to generate a selection of images that represented what I was after, and from which I was able to choose one that I like best of all.

Waves approaching a shore have a natural rhythm and periodicity that can be brought out by removing all the general splashing of the sea by panning camera horizontally. Trees whose energy is directed upwards can be an abstracted from the forest using a vertical pan.

It should be possible to do something like this in Photoshop (by applying a motion blur for instance), but I've never felt that approach is terribly satisfactory. By working on the subject with the camera and trying variations of technique, speed, direction is possible to obtain very pleasing abstraction of subjects without any postprocessing.

The way I go about this is to choose a shutter speed that is sufficiently long to allow blurring while I pan the camera fairly rapidly across the subject, keeping the movement as smooth as possible. The nature of the subject will dictate the shutter speed but typically between 1/4 and 1/30 second, using a relatively normal focal length (any focal length suitable to the subject, but usually with a standard zoom). Normally this can be done with setting the camera to its lowest ISO with shutter speed priority. On very bright days it may be necessary to add a neutral density filter, especially if you want to retain some control of depth of field.

Typically I pan the camera over the subject and just take one picture that includes the area of interest. I'll repeat the panning several times, because each attempt yields a different result. Then I review the pictures on the back of the camera and make adjustments to shutter speed, exposure compensation etc. I might end up with 50 tries for a single image.

The one at the top of page comes from Dungeness a few days ago. Phil, Martin and I arrived on the beach before dawn, and this was a picture I had previsualised. The picture was taken almost immediately before sunrise.

The last picture comes from some bluebell woods near us last spring. I have tried the panning technique each year for the last three or four, and generally get something that I rather like. This one is a bit of a favourite.

Many other photographers have tried this, and it's worth looking at their work for inspiration. As an example, Julieanne Kost has done slow exposures from a car window, so that the motion of the vehicle represents panning across the subject. I've tried several times myself with limited success -- but that won't stop me trying again.

Impressions of a bluebell wood, #3.

Friday, 8 June 2012

Simple intensification of blue skies in Camera Raw or Lightroom

Fig. 1. Belgian Air Force F16 displaying at Duxford, May 2012. (Left) Straight from the camera. (Right) Blue sky intensified as described in the text.
I'm sure this idea has occurred to many other people, but I've not seen it in any online tutorial specifically, so I thought I would post it.

When I'm photographing aircraft against blue skies, I like the blue to be really intense blue, a bit like the sky in high mountains (or, more prosaically, the effect given by a polarising filter). British skies are usually some pallid shade of blue (Fig. 1, left) rather than the intense blue I like (Fig. 1, right). So, for the last couple of years, I've been using a very simple way in Camera Raw and now Lightroom to intensify them. There are lots of other ways to do this, but this has the virtue of being simple and quick.

The blue of the sky sits conveniently within the colour range covered by the Blue slider in the HSL panel. The sky can be darkened simply by sliding the Luminance Blue slider to the left. Sometimes skies can have a bit of Aqua in as well, so that slider might have come down as well. The best way to do this is to use the targeted adjustment tool for Luminance and then drag downwards on the sky.

What usually happens when doing this, though, is that the apparent saturation of the sky increases to the point where it is not realistic. So now use the targeted adjustment tool to drag the Saturation on the sky down (maybe just a little) to the point where you get a fairly realistic looking intense sky.

At this point, all the manipulation to the sky can bring out a lot of noise. So it is necessary to add a bit of noise reduction from the Detail panel. It may be necessary to use both Luminance and Colour noise reduction.

For simplicity, I've set up a Lightroom preset that drops Blue and Aqua Luminance and Saturation and adds some noise reduction. This makes a good starting point for intensified skies, and typically does not require big moves on the sliders from there to get a satisfactory result. Fig. 2 shows the HSL settings for this.

Fig. 2. HSL settings for simple blue sky preset (Lightroom 4.1)
This works well so long as the subject aircraft is not bright blue itself -- and most that I come across are not. Even where an aircraft has, say, a blue stripe on it, the effect is not objectionable, and so generally does not require masking off.

Sunday, 29 January 2012

The joy of EXIF. Part 3: EXIFtool

-->
EXIFtool is a free piece of software that can be run as a command-line tool, or a GUI is available. I use it as a command-line tool through the MacOSX Terminal app, and, as I'll demonstrate below, send the output from it through standard text processing tools to generate files of data that can be interpreted for drawing wider lessons.

EXIF tool generates plain text files that contain the metadata. Here is an example. One of my raw files (in this case _AJB2756.NEF) can be examined using EXIF tool as follows (note that the % symbol represents the command prompt):

%exiftool _AJB2756.NEF >exif.txt

The resulting file, exif.txt, contains a long list of data. Among these are the basic camera and exposure details: in addition, lots of other stuff that you might not expect to be in there as well is revealed. For example, the camera serial number, the type of lens, as well as data that I have embedded in the file in the process of ingesting raw files from my CompactFlash card onto my hard disk. Here’s a (very) abbreviated look:

ExifTool Version Number         : 8.55
File Name                       : _AJB2756.NEF
Make                            : NIKON CORPORATION
Camera Model Name               : NIKON D300
Usage Terms                     : For consideration only, no reproduction without prior written permission
Rating                          : 3
Exposure Time                   : 1/100
F Number                        : 11.0
Exposure Program                : Aperture-priority AE
ISO                             : 200
Create Date                     : 2010:05:16 10:14:04
Exposure Compensation           : +1/3
Focal Length                    : 50.0 mm
Quality                         : RAW
Lens ID                         : AF-S DX Zoom-Nikkor 18-70mm f/3.5-4.5G IF-ED

So, we’ve immediately got all the basic shooting details – exposure, lens etc. Even the star rating I applied to this image on first pass through ViewNX is revealed.

EXIFtool in batch
But how to learn from this? One of the things about EXIF tool that makes it so useful is that it runs in batch mode. This means it can extract the metadata from a large number of files at once. To extract meaning from the resulting pile of data, it is necessary to do a little bit of mining. Fortunately, since the data comes out as plain text, it is possible to use basic text processing tools to extract any piece of information you want.

Errr... here’s where it gets geeky. It involves Unix-style text processing. So, if you have a folder full of raw images (in my case Nikon NEF files), you might type the following at the command prompt:

%exiftool *.NEF >exif.txt

This generates a plain text file that can be read by Windows Notepad or Apple’s TextEdit etc. But this will probably generate more than you want to go through by hand. So the thing to do is to pick out lines that define relevant information in each image file, by directing the output through a word finder program (e.g. egrep) instead.

A trivial example might be to find out which lenses you use most when travelling, to help make a choice when next going away. For example, only one of the lenses I took with me to Cornwall earlier this year has Nikon's AF-S focusing, so I could search for AF-S using the tool egrep, and then find out how many instances of AF-S were reported by EXIFtool.

%exiftool *.NEF | egrep  AF-S | wc -l

But this simply duplicates what can be done more easily in Lightroom (see my previous piece).

Nevertheless, taking this approach, it's possible to search much further than Lightroom does at present. For instance,there are unique identifiers in the EXIF for each lens. Combining egrep and sed processes in a single line of commands, it is easy to get a listing of the actual focal lengths used (see note at bottom for the actual lines used) with any individual lens. If you feel the need to take this level of analysis further, the data can then go into something like Excel to look at how often ranges of focal lengths are used.

Analysis of the way I use the 18-70mm zoom reveals that I use focal lengths throughout the range, but with a strong bias towards the wide end.Not only that, but analysing the 10-20mm data suggests I like to use the range around 16-20mm a lot. Perhaps not surprising when my favoured very wide angle prime on film was 24mm (equivalent to 16mm on DX).

So why am I writing about this now? 

As I posted previously, I’ve just become the proud owner of a used D700. But that comes with a demand on lenses: the 18-70mm lens I have as a standard zoom on the D300 is a DX lens, and, although it will work on a D700, only yields a 5 MP image. So what to get as the standard zoom on the D700? I kind of know this instinctively anyway, but the closest fit to the way I use lenses is the 24-120mm f4 VR Nikkor. Bloody expensive though. But at least I have good reason for thinking I'd be likely make good use of it.

-----------------------------
exiftool *.NEF |egrep "AF-S DX" -B 170 | egrep "^Focal Length  " | sed s/"Focal Length  *: "//g | sed s/" mm"//g >18-70.txt

exiftool *.NEF |egrep "HSM" -B 170 | egrep "^Focal Length  " | sed s/"Focal Length  *: "//g | sed s/" mm"//g >10-20.txt

(And yes, I'm sure that real Unix experts can come up with something much more economical to write and efficient to use, but this worked for me. But if you know of simpler and better code, please feel free to add a comment. Thanks.)

Saturday, 21 January 2012

The joy of EXIF. Part 2: learning about the way you take pictures

There are a number of ways to access the data embedded in your own RAW files: you don’t just have to use a web browser to access data. Lightroom is brilliant EXIF browser, among all the other things it does. The other wonderful tool I’ll mention later is EXIFtool by Phil Harvey.

Lightroom lets you display the metadata from any directory of images. In grid view, just activate Metadata and Attribute.

When you’ve accumulated a bunch of gear, it is quite nice to know what actually works for you, and what is just surplus. This is particularly important when packing for a trip. Lightroom lets you look back at any folder (perhaps the pictures from another trip) and identify which lenses you used most. Here is the data for my use of the D300 during Wonky Horizons long weekend in Cornwall last year.
LR metadata display (note that under the Camera heading is an unknown camera. Actually, I used the D300 for all the pictures I took. But some of the other programmes I used in post-processing stripped out the metadata) 

Clearly, I get good use out of all the lenses I took. But how many of them yielded images I bothered to give a star rating?*
Metadata plus Attribute
Just looking for images that ended up labelled 3* or 5* showed I liked a lot of images from the Sigma 10-20mm, and the 18-70mm, 60mm micro and 105mm AF-DC Nikkors. But the 80-400 Nikkor? A waste of energy to lug around. Can safely save effort and leave at home next time.

This is simply an astonishing benefit of the digital age. I can’t think of any way of doing something similar with film.

---------------------------------

* I use star ratings a lot when making a first pass selection from a shoot for editing. Mine is basically a yes/no system, which is then refined further. I open the pictures in Nikon’s ViewNX first: this is a fast free viewer that treats NEFs as native files and shows them quickly. Going through them I mark the ones for further consideration with 3*. Subsequently, this can be refined to 5* or 0* is required. Items for immediate deletion get marked in red, and deleted in batch at the end of the first scrutiny. So anything worthwhile ends up labelled with 3* or 5*. (Mostly, I just leave the rating at 3* - usually there at too few good ones to need further refining). The good thing is that the * ratings are read by both Lightroom and Bridge, so I rate in ViewNX first, and then usually develop in Lightroom. (Lightroom itself is far too slow on my laptop as a browser for first pass rating).

The joy of EXIF. Part 1: EXIF for learning

Metadata -- data about data *
Digital photographs contain a lot of information embedded within them that you can’t normally see. The data remains invisible unless revealed by the use of tools available in specialist programmes (including Photoshop) or via plug-ins available for web browsers. My impression is that most normal photographers don't care much about this, even though they may vaguely be aware that items like exposure data are embedded in their digital files. But any photographer can find good uses for the masses of data that is available both in their own files and those that other photographers post on the Internet.

What is Metadata? Digital photos use file formats described as exchangeable image file formats -- otherwise known as EXIF. Within the EXIF is a pile of data which records information about the camera, lens, ISO, aperture, shutter speed and much, much more. These "data about the image data" are the metadata. It is possible for a photographer to add their own details to the metadata, to provide contact details and copyright ownership etc.

This all sounds fairly technical and geeky, so why should any normal photographer care? One simple answer is that it is a great learning tool.

Tools for Web browsers: learning from others
The current web browsers have plug-ins or add-ins that allow you to reveal data in the EXIF for images posted on the Internet. Perhaps the most widely used is Opanda IExif, a plug-in available for both Internet Explorer and Firefox under Windows (unfortunately, at the time of writing, Opanda IExif is incompatible with Firefox 9). Firefox also has other add-ons that are available on the Mac as well as Windows, including EXIF viewer and Fxif.

It is often very informative to look at the metadata that other photographers leave embedded in images posted on web forums and the like. For example, when I was trying to learn a bit about aviation photography, I was curious to know things like shutter speeds for getting propellers to look like they are rotating, or focal lengths to get a distant aircraft nicely framed. By looking at the EXIF data in really good examples of aviation photographs, I could see what tended to work well. Correspondingly, it's often useful to look at crummy examples to learn where things can go wrong. As always, it is vital to use your own judgement about what is successful or hopeless when trying to learn good and bad points of technique in this way. Just because any photographer has used a particular method, does not mean it is good!
Piper Supercub at Headcorn

Here is an example of one of my own. This picture of a Piper Supercub was taken at Headcorn, a small but busy airfield just up the way. When possible, I always like to try to get a sense of motion when I'm photographing an aircraft, by using a lowish shutter speed to give nice motion blur to the background. What I learned early on from looking at other peoples’ images is that you have to go down to quite low shutter speeds, particularly with older aircraft, to get decent background blurring. The EXIF data embedded in this one says I used 1/80 second: this gets the effect I was after. Having said that, I should point out that it was taken with a focal length of 160 mm on a crop-sensor camera: the "keeper rate" goes down exponentially with increasing focal length, especially when getting up to around 400mm.

In any case, you can apply this idea to any area of photography. Perhaps next time you see an interesting photo, it might be worth looking at the EXIF data – there might be something there to learn.

-----------------------------

*I was talking to the final year Biochemistry students a while ago about writing up their research projects. I can't remember why, but something I said provoked one of them to say "You are such a geek!" To be called a geek by a scientist is quite something -- I think this post will simply confirm it.